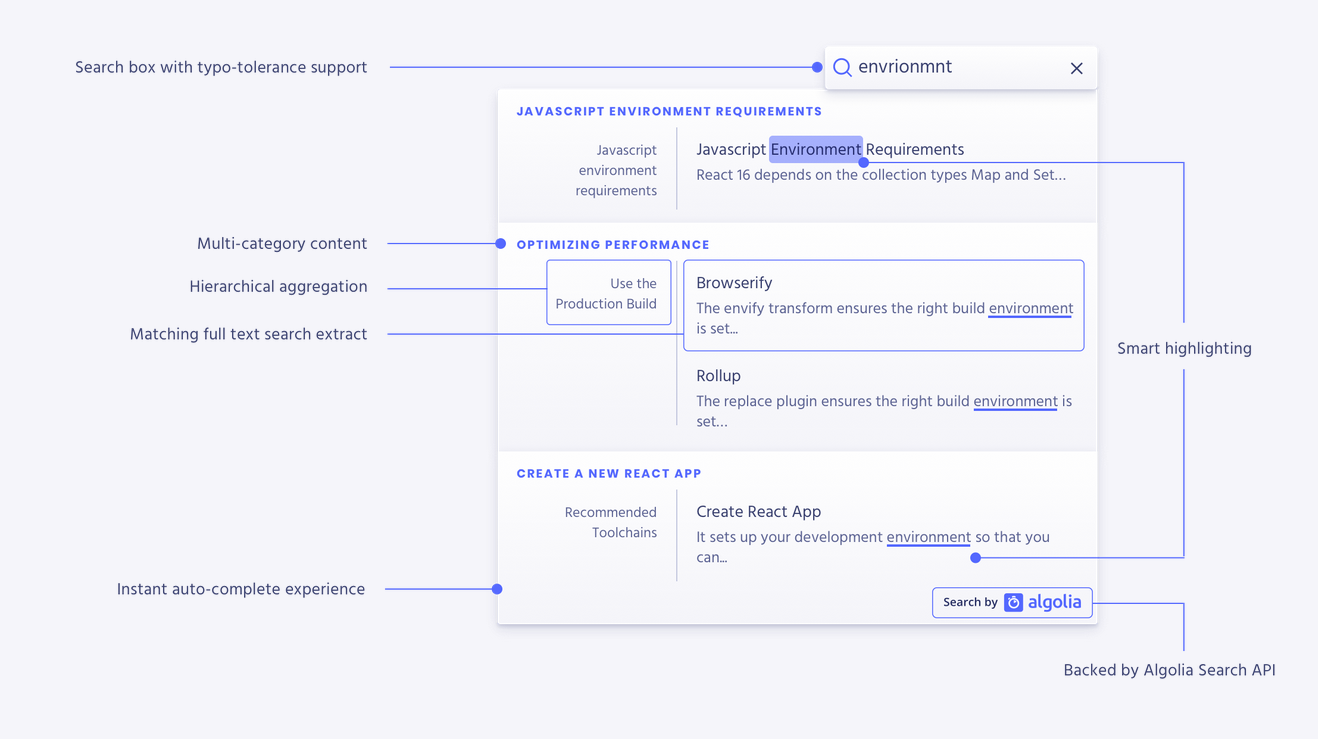
Algolia 提供的 DocSearch 非常酷炫,但是只面向文档提供服务,像本站这样的博客是不能提交的。最近研究了一下 DocSearch 的实现,成功的将 DocSearch 现有的前端实现套用在了自己生成的数据上(因为我真的不会写搜索框)。
DocSearch 的实现
DocSearch 本质上由两部分组成:
- docsearch-scraper 一个用 python 实现的简易爬虫,他将抓取指定的网站并生成指定格式的数据
- docsearch 这是 docsearch 的前端实现,包括 algolia 的客户端和各种前端交互
显然,DocSearch 的实现是互相绑定的,正如 Issue Uncaught (in promise) Error: [groupBy]: Object has no key lvl0 中所说:
docsearch frontend only works with indices generated with the docsearch crawler. If you want to build a autocomplete dropdown you should use autocomplete.js instead, which allow to build autocomplete dropdown on top of any indices.
Issue 中给出的解决方案让我们使用 autocomplete.js 来自行构建(但是这太难了),但是换个角度想,只要我们能构造出跟 docsearch crawler 完全一致的数据结构,我们就能直接用 DocSearch 了!
构造数据有两种方案,第一种是直接运行 docsearch crawler,第二种是使用 Hugo 内置的模板机制进行构造。运行 docsearch crawler 会让我们的博客构建流程变得特别复杂,而且生成的数据会太多,很容易超出免费额度,而且博客这种非结构化的内容也不适合按照文档的方式来进行展示。所以我们选择使用 Hugo 内置的模板机制来生成索引文件,只要稍微花点时间研究一下 docsearch-scraper 是怎么工作的就好。
数据结构
简单的分析一下 docsearch-scraper 最后生成的数据结构(省略了很多冗余信息):
{
  "objectID": "<object_id>",
  "type": "<type>",
  "hierarchy": {
    "lvl0": "<lvl0>",
    "lvl1": "<lvl1>",
    "lvl2": "<lvl2>",
    "lvl3": "<lvl3>",
    "lvl4": "<lvl4>",
    "lvl5": "<lvl5>"
  },
  "content": "<content>"
}按照文档中所描述的,objectID 是标注该段内容的唯一 ID,type 标志着内容的类型,hierarchy 描述这段内容的层级关系,通常是 <h1>/<h2>/<hX> 这样 header 中的内容,而 content 则是对应 header 下文本的内容。
博客的内容通常不会这么结构化,而且受限于免费额度限制,我们通常也不会提交整个网站,只会提交一个摘要。所以我们可以提交一个空的 hierarchy ,让 DocSearch 可以正常工作,最后通过 CSS 将不需要的部分隐藏。
实现
完整实现可以参考 Commit Add full text search support (#84),本文中只会讲解一些关键步骤。
Hugo 自带的模板机制可以帮助我们生成对应的索引数据,创建文件 layouts/_default/list.algolia.json:
{{- $.Scratch.Add "index" slice -}}
{{- $section := $.Site.GetPage "section" .Section }}
{{- range .Site.AllPages -}}
{{- if and (ne .Type "page") (eq .Kind "page") -}}
{{- $.Scratch.Add "index" (dict "objectID" .RelPermalink "type" .Params.Categories "content" (print (substr (.Summary | plainify) 0 20) "...") "summary" (.Summary | plainify) "hierarchy" (dict "lvl0" .Params.Categories "lvl1" .Title "lvl2" "" "lvl3" "") "url" .RelPermalink "tags" .Params.Tags ) }}
{{- end -}}
{{- end -}}
{{- $.Scratch.Get "index" | jsonify -}}
这里构造出了符合要求的 DocSearch 数据,有个细节是这样的:
content 中的内容会展示在搜索框中,所以将其截断为 20 字符避免太长;另外追加了一个 summary 字段并设置为搜索字段,这样可以避免 content 被截断后导致很多内容检索不到。
接下来需要在构建流程中加入 atomic-algolia,它能够原子化地更新 Algolia 数据,只更新发生变更的数据,尽可能减少更新索引的次数。
我在 package.json 中加入了这样的脚本:
"scripts": {
  "algolia": "if [ $ALGOLIA_INDEX_NAME ]; then atomic-algolia; else echo \"ALGOLIA_INDEX_NAME not setup, ignore\"; fi"
},
在运行构建的时候需要设置如下环境变量:
ALGOLIA_APP_ID=<app_id>
ALGOLIA_ADMIN_KEY=<admin_key>
ALGOLIA_INDEX_NAME=<index_name>
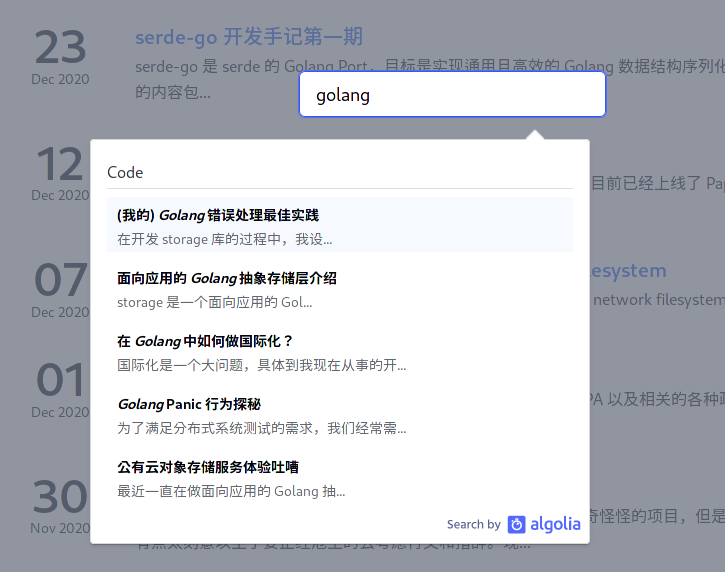
ALGOLIA_INDEX_FILE=<path_to_index_file>这样,数据侧的工作已经完整了,接下来我们只需要在模板中加入 DocSearch 代码即可,这里不再赘述。前文提到我们可以通过 CSS 将不要的部分隐藏,我在 CSS 中加入了如下 Hack:
.algolia-autocomplete .algolia-docsearch-suggestion .algolia-docsearch-suggestion--subcategory-column {
    display: none !important;
}

.algolia-autocomplete .algolia-docsearch-suggestion--content::before {
    display: none !important;
}

.algolia-autocomplete .algolia-docsearch-suggestion--content {
    float: right !important;
    width: 100% !important;
}
这样,一个丑丑的搜索就做好了: